Whether you’re looking to switch up your internet or want to take your connection speeds on the go, Wi-Fi is versatile and suits virtually every household. Once you (or a professional) install the modem and router, you’ll be a few clicks away from internet access on any of your personal devices. Here’s how to set up your wireless connection for Windows and how to fix some of the most common troubleshooting issues you may encounter.
Setting Up Wi-Fi in Windows
Depending on which version of Windows you have installed on your computer, the steps listed below may differ. However, the process of connecting to your network is still the same.
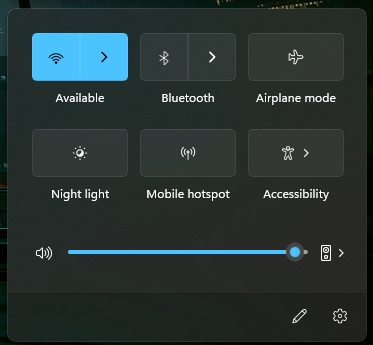
First, open your Windows notifications, located in the bottom right-hand corner. From there, click on “Manage Wi-Fi Settings,” indicated by the arrow next to the Wi-Fi icon.

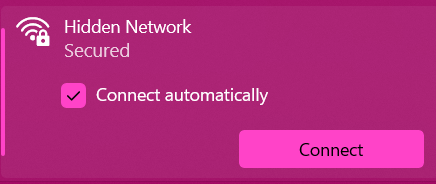
From there, you’ll see a list of networks. Locate your Wi-Fi network name and click the “Connect” button. You can also select the “Connect automatically” checkbox if you’d like to automatically connect to the web in the future.

Assuming your connection is secure, you’ll need to input your network password. You can find this password on your router or locate it in the Windows Network and Sharing Center. Once you’ve input and submitted the password, you’ll have successfully connected to your Wi-Fi network and can start using it however you’d like.
Common Wi-Fi Troubleshooting Tips
Connecting to the internet is a pretty straightforward process, but sometimes it requires an extra step to ensure all the pieces are in place before you go online. Before you call an ISP representative, check out a few of our tips below.
Turn Off Airplane Mode
If you can’t find your Wi-Fi network, double-check that Wi-Fi is enabled on your device. When you open the notifications area, click on the Wi-Fi icon to turn it on. From there, click on the down arrow next to it, and you should see a list of networks local to your area. You should be able to see your network appear shortly afterward.
In addition to enabling Wi-Fi, check the “Airplane Mode” status located in the same menu. Airplane mode prevents wireless signals from going into and out of your device, and it’s usually turned on while you’re flying so it doesn’t interfere with the pilot’s wireless communication system. It’s perfectly fine to have it off when you’re on the ground, so be sure to disable it so you can connect to your network.
Run the Built-in Windows Troubleshooter

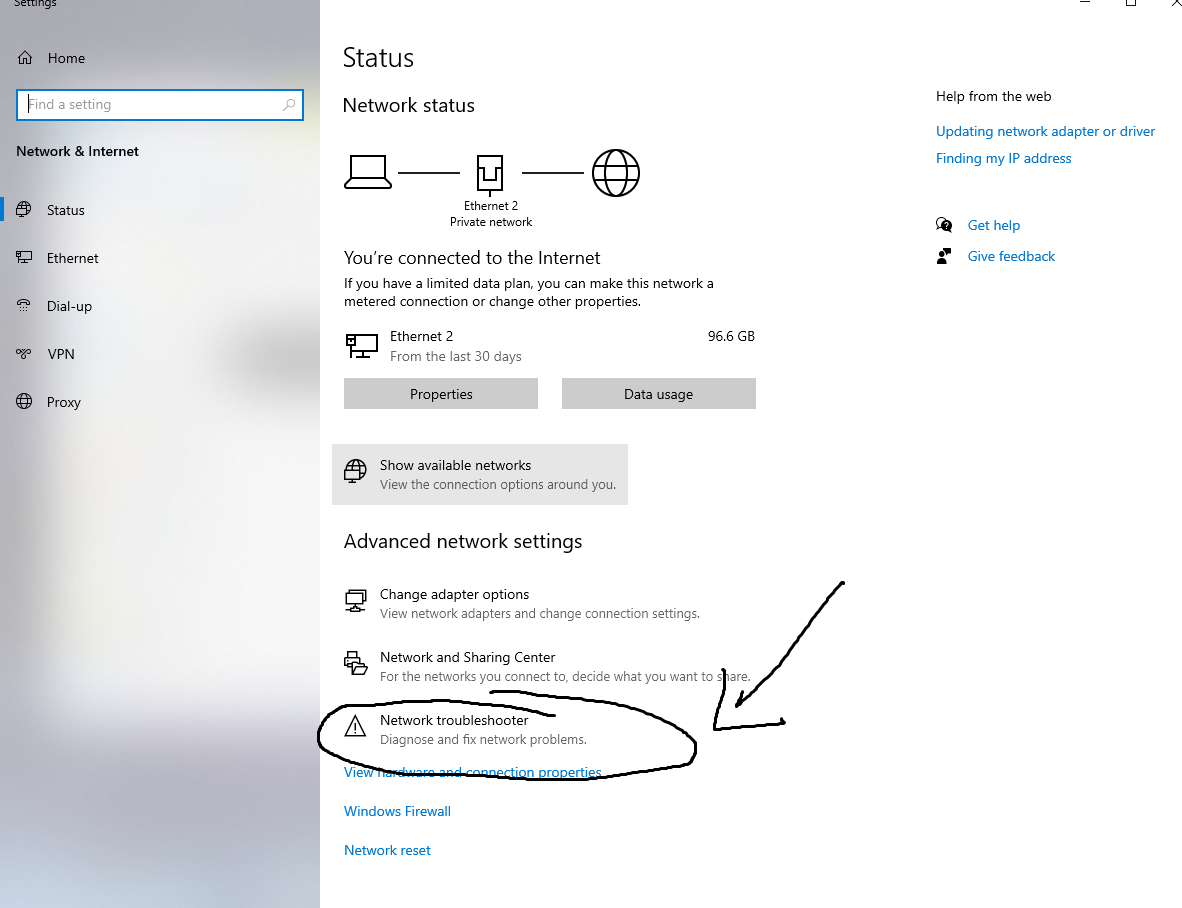
Windows 10 has built-in troubleshooting software that can run a diagnosis on your computer. You can either use the search bar and type in “Network troubleshooter,” or locate the network troubleshooter option under “Status” in the “Network and Internet” settings. By following the prompts within the troubleshooter, you should be able to pinpoint the issues that are preventing you from connecting to your network.
Reset Your Modem
When all else fails, resetting your modem is another way to solve some of the internet connection issues you may have. Disconnect the power cable from your modem, or you can also try unplugging the Ethernet cable simultaneously and wait a couple of minutes to allow your network to fully reset. Plug the power cable back in, and wait a few more minutes while your modem starts receiving wireless signals. If successful, you should now be connected or reconnected on your devices.


